Showing posts with label PowerPoint. Show all posts

Adobe Presenter 9- Using the Drag & Drop Feature

With the release of Adobe Presenter 9 comes the Drag and Drop feature which gives developers a way to create interactive drag and drop questions to a quiz. The Drag and Drop feature is intuitive and allows you to create a number of different types of questions that can include both text and pictures. In the Halloween example, I created a simple Drag and Drop quiz called the Candy Challenge that allows the user to match a picture of the candy bar with the name of the candy. In the screencast below you will see just how easy it is to create a Drag and Drop question in Adobe Presenter 9.


To actually try the Candy Challenge click on the link.

Adobe Presenter 9 - Powerful New Features!

Adobe Presenter 9 just might be one of Adobe's best kept secrets. As a long time Adobe Presenter user it is really exciting to see the evolution of this product and watch as the feature set grows. Adobe Presenter 9 has to be one of the best releases and one that will enable subject matter experts, teachers, and instructional designers to develop full blown courses with audio, video and multimedia. For those of you who may not be familiar with Adobe Presenter, it is a plug-in to Microsoft PowerPoint on Windows, that adds a full set of new features to PowerPoint making it easy to create eLearning modules. For those of you who have been using PowerPoint for years, having access to Adobe Presenter 9 will afford you opportunity to quickly turn your presentations into full fledged eLearning assets that can be published to Adobe Connect, a Web server, or your Learning Management System.

Adobe presenter 9 tool bar
Adobe Presenter 9 Toolbar
As a subject matter expert, Adobe Presenter 9 lets me package my eLearning material in a very professional manner that is ready to be hosted on our college Learning Management System (Moodle). I will talk more about that a little later in this post. One of the new features to be added to Adobe Presenter 9 is Adobe Presenter Video Creator which opens up all kind of possibilities for creating high quality instructional videos from your desktop without the need to know a lot of about editing or videography. Being in the field of assistive technology, I want to applaud Adobe for making Adobe Presenter 9 a truly accessible tool for students with a range of visual, motor, hearing and learning disabilities. In fact, Adobe Presenter Video Creator lets you create Closed Captioning videos on the fly utilizing their proprietary speech to text engine when creating the video. Adobe Presenter 9 adds Section 508 compliance which is a welcome addition.

Once you install Adobe Presenter 9 it is easy to get started on crafting your eLearning material. The workflow could not be any easier, open up you presentation in Microsoft PowerPoint and click on the Adobe Presenter tab which now open up a whole new world for features for creating your materials. Depending on my goals there are times when I will add an audio narration to the slides which can be done simply using my built-in microphone on my laptop. There is always the option to import audio and utilize an external microphone for better recording quality. When it is time to sync the audio to your text Adobe Presenter 9 provides you with an easy to use feature to accomplish this. To spice up my eLearning material, I will often include one or two of the built in interactions that can be found in Adobe Presenter 9. Sometimes I will add a Word Search or a Jigsaw Puzzle to engage and have my
Interaction Types
students interact with the material in a fun way. Adobe Presenter 9 includes over 12 different types of interactions which you can add to your presentation. Having access now to both Characters and Scenes opens up the possibilities when using Adobe Presenter 9 to create scenario based eLearning materials. In fact of the newest features that is found in Adobe Presenter 9, is the Insert Scenario Interaction which lets you drop in a pre-set scenario whereby all of the characters and scenes with the associated paths have been programmed for you. This is ideal for doing what-if scenarios and gives your participants the option to test out what they have learned. At this
Insert Scenario
point in time the characters and scenes are slanted towards business and I have provided Adobe with my feedback that they need to include more characters and scenes that are relevant for K-12 and Higher Education. Despite the need for more relevant characters and scenes this is still a powerful tool to utilize as you put together your eLearning material.

OK, so I added my slides, audio narration, some interactions and maybe even some video-now I would like to assess what my students have learned from the module. From my perspective as a
Quiz Question Types
professor it is important for me know that my students are grasping the information and key concepts and what better way to do that than by adding a quiz to the material. Adobe Presenter 9 makes it easy to add a quiz and now includes 9 different types of questions that I can add to a quiz. One of the most asked for features, Drag & Drop was added to Adobe Presenter 9 which opens up all kinds of possibilities for assessing my students. While adding a quiz has always been a standard feature, I am particularly excited by the addition of the Collaboration feature and the Student Analytic Dashboard that was recently added to Adobe Presenter 9. With the Collaboration feature tuned on students can engage in an ongoing conversation about the material and learn from one another as they are interacting with the material. Adobe makes this feature easy to use and it doesn't require that you have a Learning Management System in place. Once this feature is turned on all users will see a question mark on the bottom of the learning module that they can click to view and ask questions. This is a great feature to get students more engaged and gives them the opportunity to learn from one another. One of the other benefits of Adobe Presenter 9 is that it supports Sharable Content Object Reference Model (SCORM) which makes it ideal of uploading to Moodle. Setting up the SCORM package is a cinch in Adobe Presenter 9 and when I am done I can upload it as a ZIP file to Moodle and my students can view the material and answer the quiz. Moodle handles the Adobe Presenter 9 SCORM files exceptionally well and will automatically report the students quiz scores to me.

The feature that I am most excited about in this release of Adobe Presenter 9 is the Student Dashboard which takes Adobe Presenter 9 to a new realm for me as I deliver more content online to my students. Adobe has done a masterful job of providing me with a way to monitor my students progress as they work on a learning module. I just started back teaching and have put up my first
Dashboard
module to see how this feature would work and all I can say is wow- this truly gives me a snapshot of where my students are in the module and if any of them need some assistance. The Dashboard is extremely visual and I have found easy to use. The heat map of where my students are in the process of completing the module gives me a quick overview of their progress. At any time I can email or share their progress directly form the Dashboard. Adobe Presenter 9 also gives me the capability to set an Intervention date that alert me of students who are not progressing through the eLearning Module- this giving me the opportunity to intervene. Having access to the Dashboard is a tremendous feature and one that I know I will take advantage throughout the semester. Kudos to Adobe for building this feature in!

When it comes time to publishing my course there are lots of options for output-you may want to consider uploading it to your Adobe Connect account, a web server, a LMS, or as a PDF that you can distribute. I have always been impressed with the options and the look and feel of the course when it is packaged within Adobe Presenter 9. Adobe Presenter 9 gives you complete control over how your published course will look and how users will navigate through the module. I for one like how Adobe
Published Adobe Presenter 9 Module
Presenter 9 creates an index and the sidebar, but if you choose you can completely remove that and utilize your own system for navigating the module. Adobe Presenter 9 also makes it easier to attach accompanying documents to your learning module which are then easily accessible to the learner. Adobe Presenter 9 opens up all kind of new possibilities for teachers, instructors, and eLearning professionals that are looking for ways to utilize their legacy PowerPoint presentations. With a little seat time you will be up and running using the powerful features in Adobe Presenter 9 to publish your courses to the web or mobile devices (IOS and Android apps are available). Adobe has added a number of new features to the recent release of Adobe Presenter 9 which makes this application even more powerful without the steep learning curve. As I said in the beginning Adobe Presenter 9 may just be the best kept secret in Adobe's suite of software applications -but I have a sneaking suspicion that they know they have a real winner on their hands with this release, and I'm sure they will do all they can to get the word out going forward.If you would like to try Adobe Presenter 9- Adobe has a 30 day trial version that you can download from the web.

Please look for another post soon on the Adobe Presenter Video Creator which opens up all kind of new possibilities.

Using Adobe Presenter 8 with Moodle

This semester I have had the opportunity to teach an online class for one student that needed the course to graduate. Fortunately for me, I have had access to Adobe Presenter 8 and Moodle to teach and thought that it would be a great way for me to deliver the course to my student. We are now half way through the semester and using these tools has made it easy for me to deliver learning modules to my student that he is able to work through. The beauty of using Adobe Presenter 8 is that I have plenty of PowerPoint presentations that I have done over the years which I have been able to convert to learning modules. Having access to the features found in Adobe Presenter 8 has allowed me to add video, audio as well as quizzes to my modules which really has enhanced the learning experience for my student. Adobe Presenter 8 is great at wrapping up your PowerPoint presentation and delivering them as a stand alone eLearning asset.

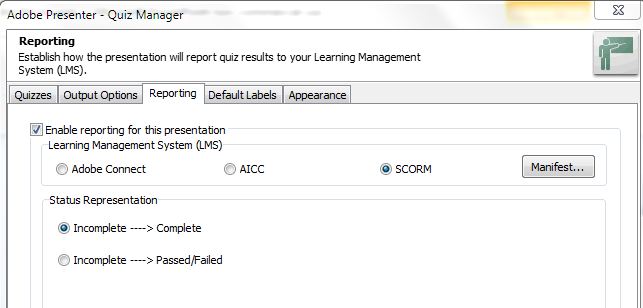
One of the features that has really worked well for me using Adobe Presenter 8 is the ability to create a SCORM (Sharable Content Object Reference Model)  compatible course from my PowerPoint presentations that I can then upload to Moodle. Using the Quiz feature found within Adobe Presenter 8, I am able to create a variety of different types of questions that allows me to assess what the student has learned during the session. It also provides a valuable way for my students to receive feedback after they have worked through the module. Creating the SCORM compatible file from your course is a cinch when using Adobe Presenter 8 which makes it really easy to upload to Moodle. From within the Quiz Manager select the Reporting tab and simply select the SCORM option. Now you simply have to Publish your course from within Presenter 8 and save the course using the Zip package format.

Now that you have saved the course in the zip package format it is time to upload it to your Moodle course. First select the week that you would like your students to have access to the learning module and from the drop down select SCORM activity. Upload your course that you saved in the zip format to Moodle and you are done. If you like you can customize and control how many times the students can attempt the course. That's all you need to do. Now when your students access the course and take the quiz Moodle will report the students score to you and whether they passed or not. Using Adobe Presenter 8 along with Moodle has been a really fantastic experience and has allowed me to quickly create courses and provide a way for my student to receive immediate feedback. As a professor, I am always looking for new ways to efficiently develop eLearning materials and using Adobe Presenter 8 really foots the bill!


Using Adobe Presenter 8 for eLearning

Having used Adobe Presenter 7 to create eLearning material it was exciting to learn that Adobe had released a new version of Adobe Presenter with a slew of new and exciting features. I have had a chance to work with Adobe Presenter 8 for the past two months to learn the ins and outs of the program and am really impressed with the product and some of the new features that have been added. Adobe Presenter 8 remains a plug-in for PowerPoint on the Windows platform which when installed appears as a new Tab on the PowerPoint Ribbon. Once you click on the Tab you will see a host of features that are specific to Adobe Presenter 8 that you can utilize. To get started with Adobe Presenter 8 just open an existing PowerPoint, click on the Adobe Presenter Tab and you can then bring in video, record audio and build an eLearning module complete with navigation and quizzes. Subject matter experts will enjoy the easy to use interface and be creating modules in no time. One of the real strengths of Adobe Presenter 8 is the intuitive interface which will ensure a fast learning curve.

As more and more students are learning online it is essential that as subject matter experts that we have easy to use tools to create rich online materials. Using a HD webcam you can bring in high quality video into your eLearning courses with Adobe Presenter 8 and display it on a slide or on the Navigation pane.  Adobe Presenter 8 lets you customize the Navigation pane and gives you control over the color selection. In the current version of Adobe Presenter 8 you can have the Navigation pane inherit the color and theme of your PowerPoint presentation giving it a lot of pizzazz and visual appeal. Narrating your presentation could not be easier with Adobe Presenter 8. When using the recording feature you can import all of your Slide notes and have them ready to access as you add audio to your eLearning module. If you have animations on your slides Adobe Presenter 8 makes it easy to synchronize the animations to your audio thus ensuring that the audio and animation matches during playback.

Adobe Presenter 8 has added a host of new features like Interactions, Characters and Scenes which will make your presentations more compelling and interactive. It is now easy to add a scene to your PowerPoint presentation by selecting from any of the built-in scenes provided. You can then overly that with characters that have added to Adobe Presenter 8 to give your eLearning module a polished and professional look. To add more interactivity into your module you can now select from several new Interactions that have been added to Adobe Presenter 8. When the eLearning module has been published students can interact with the presentation making it a more dynamic experience.

What has always impressed me about Adobe Presenter 8 is the ease of use and the way that it can wrap up your material up complete with navigation to make for a very professional looking course. Since so many professionals have legacy PowerPoint presentations-having access to Adobe Presenter 8 makes sense for those of you who are considering putting together online courses. Adobe Presenter 8 eLearning courses can be published to your Adobe Connect account,  or as a PDF that can be viewed with the Adobe Acrobat Reader 9 or above. Adobe Presenter 8 can also be viewed on an iPad using the Presenter App. Please note there are some limitations viewing eLearning courses on the iPad.

One of the most innovative new features in Adobe Presenter 8 is the addition of the Video Creator tool. Now it is possible to create highly engaging material with high quality video without the need for an expensive video creation application. Using a high quality webcam like the Logitech 920D-it is now possible to produce great videos right within Adobe Presenter 8. After hitting the record button you have the option to record within your PowerPoint presentation or you can use it to demonstrate any software application that you have access to on your computer. The editing tools are easy to access and use and the published video allows you to be on the right or left side of the screen as you demonstrate whats on your computer screen. Once you have finished creating your video you can easily output and share it via Vimeo or YouTube right from Adobe Presenter 8.

While creating engaging material for your online courses is one of the goals of Adobe Presenter 8, when it comes time to assess your students, Adobe Presenter 8 includes the ability to create Quizzes which can capture what they have learned. Adobe Presenter 8 supports AICC and SCORM making it easy to connect to existing Learning Management Systems (LMS). I have used this feature within Moodle which worked well and provided me reports as to how my students performed on the learning module. Adobe Presenter 8 allows designers and teachers to include True/False, Multiple Choice, Fill in the Blanks, Short Answer, Hotspots, Likert Scale, Matching and Sequence style questions. Adobe Presenter 8 will automatically create a summary slide to provide feedback and scores to the students.

Adobe Presenter 8 hits that sweet spot for individuals that are comfortable using PowerPoint and have made an investment in creating presentations over the years. Utilizing Adobe Presenter 8 gives them the ability to quickly convert their legacy presentations into interactive presentations that can be uploaded and utilized within a LMS or published to a server. Users will appreciate the easy to use interface and now having access to the Video Creator adds a new dimension to the program allowing users the ability to create high quality video demonstrations without the need for expensive equipment. You can download a trial version of Adobe Presenter 8 and kick the tires- you will be glad you did.

Microsoft Word's Auto-Summary Feature


In Microsoft Word 2007 there is a feature that allows you to automatically summarize a document. This feature is very good for reading long articles quickly. To access this feature click on the customize quick start menu arrow at the top left of the screen. Then select more commands from the drop down menu. Next search for the Auto-Summary tool in the right hand column. Once you add this option you will be able to access it from the top right of your word documents. When the icon is clicked you will have four summary options. To see this feature in action watch the video above. Hope this tip helps.

Free PaperShow for Teachers Demo

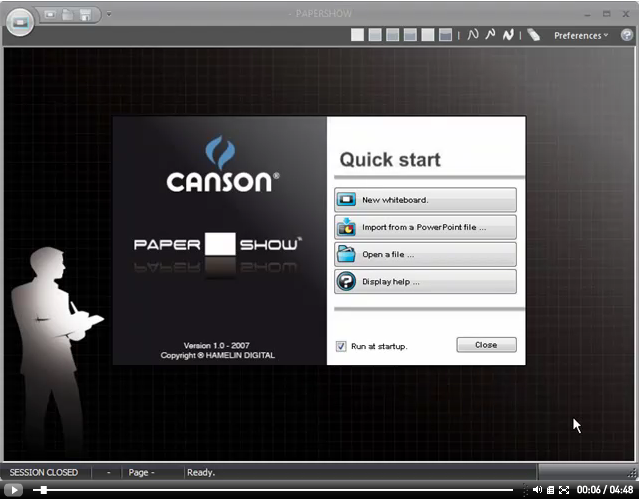
Join me on Monday November 29th at 10 am EST for a free demonstration of PaperShow for Teachers.Find out how this innovative presentation tool can be used in the classroom, boardroom, or for webinars. Click here to sign up.PaperShow for Teachers is a cost effective tool to spice up lessons, presentations and webinars. Learn how you can use PaperShow for Teachers for brainstorming sessions or for capturing ideas in the classroom. Once you have captured the information you can easily share it as a PDF file. PaperShow for Teachers also lets you annotate images or your PowerPoint slides to make for richer and more engaging presentations. So sign up for this free webinar and learn about the power of this cost effect presentation tool. Click here to sign up.  Once you sign up you will receive a link for the webinar. Hope to see you there! Brian

ShowMate-PowerPoint Presentations from your BlackBerry

The mobile application space has really been incredible to watch and while the Apple App Store gets a lot of press there are some really unique applications in the BlackBerry world as well. As someone who does a lot of presentations, I was intrigued by a product called Impatica ShowMate, which would allow me to present my PowerPoint presentations directly from my BlackBerry Curve. The ShowMate itself is extremely small and portable(3.5" x 2.5" x 1") with built in Bluetooth that you plug into your VGA cable that is attached to your data projector. Once your Impatica ShowMate is connected to your projector you can launch your PowerPoint presentation from your BlackBerry and view it. Your BlackBerry communicates to the ShowMate via the Bluetooth connection and allows you to control your slide presentation directly from your BlackBerry.

When you order the ShowMate, in the box you will find a CD to Install the Impatica Software, the ShowMate itself and a USB power cord along with some international receptacles that you can use when you travel abroad. In order to use the ShowMate the first thing you will need to do is install the Imaptica for PowerPoint software on your computer as well as the Impatica Presentation Viewer on your BlackBerry. I was able to download the Impatica PowerPoint Viewer directly over the air directly from my BlackBerry using my BlackBerry browser. While the CD to install the Impatica for PowerPoint software is in the box, Impatica suggests that you go to their website and download it to insure that you have the latest version. I was very familiar with the Impatica for PowerPoint software having done a review of it several years ago and within minutes I was up and running. The Impatica for PowerPoint software, formats your existing PowerPoint presentations (.ppt and .pptx) so that when they are outputted, can be run from your BlackBerry. The software significantly reduces the original size of your PowerPoint presentations while maintaining transitions, links, and animations. Once you have converted your presentations (works with Macintosh & Windows) with the Impatica for PowerPoint software the software lets you easily transfer your presentation directly to your BlackBerry via a USB Cable.

Once your PowerPoint presentation lands on your BlackBerry you can preview it using the Impatica PowerPoint Viewer. Making the Bluetooth connection from my BlackBerry Curve to the ShowMate was fast and easy to do. When I projected my PowerPoint presentation all of the links, transitions, and animations were preserved as if I was running it from my computer. I should mention all of the text and images were clear with excellent fidelity. Using my BlackBerry I could move forward or back through the presentation if I needed to. While doing my presentation I could also access my slide notes, if I choose to. Having access to a really portable way to present is now possible- just add this solution to the 3M MP 120 pico presenter and you could leave your laptop at home. So if you are looking for a really portable way to do your presentations from a BlackBerry then you need to look at the Impatica ShowMate. For more information about the Impatica ShowMate click here.

Editor's Note: You can also use the ShowMate to present any of your applications or contents on your BlackBerry. In order to use ShowMate in this manner you can download the free Impatica Connector application to your BlackBerry over the air. Once installed you can now connect via Bluetooth to the ShowMate and see the view the contents of your BlackBerry and through the data projector. When used in this manner, the ShowMate makes for a great training tool!

Adobe Presenter 7- Making eLearning Come to Life

While attending the NECC 2008 Conference this summer, I had the opportunity to sit through several of the Adobe presentations to see what new applications were on the horizon. Adobe was tauting their latest application called Adobe Presenter 7 which is a plug-in to PowerPoint. I would like to thank Roman from A & R Edelman for providing me with a review copy of Adobe Presenter and for his support. In a nut shell, Adobe Presenter 7, lets you convert your legacy PowerPoint applications into a Flash based presentation or PDF file. That being said, there is a lot under the hood of Adobe Presenter 7 which can turn your PowerPoint slides into a dynamic eLearning environment complete with video, navigation, attachments, quizzing, and audio. PowerPoint 2007, Adobe Presenter 7 installs a new Ribbon with all of the features. Adobe Presenter 7 is part of Adobe Acrobat 9 Extended version. Using the Help menu it was rather easy to build my first Adobe Presenter 7 presentation which included video, Flash based video tutorials that were authored in Captivate 3, and audio. Using a webcam I was able to include a video of myself introducing my company and services, which gave my piece a nice touch. Adobe Presenter 7 allowed me to customize the look and feel of the final project and even let me include PDF attachments which can make this a great way to deliver eLearning material on the web.

Having created Flash based software tutorials in Captivate 3, I could easily embed them in my PowerPoint slide presentation with complete control of how they behaved with the controllers. When thinking of the future of training, I for one am very excited by the fact that I can now embed Flash based videos directly into a PDF file which can be viewed with nothing other that the free Adobe Reader 9. This is a new feature with the release of Adobe Acrobat 9 this spring. Think about that for a moment. That is very powerful! With nothing more than Adobe Acrobat Reader 9, your students or clients will be able to take advantage of video and audio with the confidence it will just work. As long as you have Flash installed on your computer you can be sure that your presentation will deliver the content. According to the surveys more than 98% of all computer users have Flash installed. This is very exciting for me just thinking of all the possibilities of building engaging and interactive environments for others to learn new skills.


In the presentation that I created you will see how all of these elements have come together. I was able to include video from my webcam, audio from a lapel microphone, and Flash video tutorials, along with some training PDF files. What I'm most impressed about the product is just how well it wraps everything up and when you are finished you get a very professional looking presentation to share with the world. I found Adobe Presenter 7 easy to learn to use and without so much as a manual I was creating this highly interactive eLearning materials. Adobe Presenter 7 is a wonderful integrator, helping you to bring all of the pieces together to make for an exciting and interesting elearning experience. I for one really enjoyed putting this project together. Click here to view the presentation, right within your browser or if you want you can download the presentation as a PDF file here. The PDF file is 11 megabytes and will take a little time to download. This will give you some idea of the power of Adobe Acrobat in its current release. You will need to download Adobe Acrobat 9 Reader to view this presentation. Adobe Presenter 7 also allows you to create quizzes for the purpose of assessment, with a variety of different types of question formats that can be integrated into your learning management system (LMS). I will tackle this feature in another blog post later next week. You can download a trial version of Adobe Presenter 7 from the Adobe website.

Impatica 4 for PowerPoint

While PowerPoint has become a standard in many classrooms for creating presentations and multimedia projects it is often more difficult to share these presentation over the web. Many of us who want to embed photographs, audio and transitions to our PowerPoint presentations soon learn that when we attempt to put them on the web that the files become incredibly large and cumbersome to work with. This is where Impatica 4 for PowerPoint comes in. It is an extremely handy utility that not only compresses your PowerPoint files but optimizes it for streaming over the Internet. Impatica 4 for PowerPoint often can compress your PowerPoint files by up to 95% which really impacts on the time it takes to view them on the web. Moreover, Impatica 4 for PowerPoint will convert your PowerPoint files into a small Java application so that your PowerPoint presentation can be viewed by anyone who has a Java enabled browser. This means that you don’t have to be concerned if the individual viewing your presentation has a compatible copy of PowerPoint. Right within the browser, individuals can view the presentation complete with graphics, sound, narration and transitions as it was intended to be viewed. As a faculty member at a college, I am always concerned about others reusing my intellectual property and with Impatica 4 for PowerPoint, I know that individuals will only be able view my PowerPoint presentations but that they can not edit or make changes to it.

You might be saying to yourself well how does this work? The truth be known, using Impatica 4 for PowerPoint is a very easy application to use. To use Impatica 4 for PowerPoint you simply double click on the icon and it brings up the application. You are now ready to add your PowerPoint presentation. You can accomplish this by clicking on the Add button or better yet, simply drag your file into the application to get started. Impatica 4 for PowerPoint is available for both Macintosh and Windows and works equally well on both platforms.

Some of the new features for Impatica for PowerPoint version 4 include:

* Support for the PowerPoint 2007 file format
* Support for Intel-based Mac OS X and Microsoft Windows Vista computers
* Support for Palm OS viewing and projecting with the Impatica ShowMate
* Adjustable, scalable playback window
* Full screen viewing capabilities
* Enhanced logging
* Support for PowerPoint 2007 multi-stop gradients such as rainbow
* Expanded audio support in the PowerPoint 2007 file format (any audio format supported by QuickTime)
* New graphics and color scheme for user interface
* New installer mechanism for Windows computers


Once you have added the file you can customize how your viewers will interact with your PowerPoint presentation by having Impatica add playback controls. By clicking on the Media and Animation Tab you can easily configure your video and sound that viewers will be accessing.. You may need to play around with audio compression feature in Impatica to derive the best results once your PowerPoint is streamed to the web. One of the really nice featured that is built into Impatica 4 is its integration with Blackboard. If you are a college faculty member you will really like this feature. Impatica 4 for PowerPoint is capable of creating an archived file for Blackboard that adds a significant compression factor and allows you to upload the final file compressed. When the student is ready to view the file Blackboard is able to decompress the file so the student can view it.

Once you have set all of the features you simply click on the Translate button and your PowerPoint presentation is processed. Once your PowerPoint presentation has been processed you can now connect to your server from within Impatica and upload the files. Having a built in FTP client is really a fantastic feature and makes it very fast for uploading the files. Once your have uploaded your PowerPoint presentation Impatica creates a html file and places all of the necessary files on the server so that your presentation can be viewed with any Java enabled browser. This point should not be missed. Now that you have used Impatica for PowerPoint and placed the files on the web anyone with a web browser can view your files and don’t need to have PowerPoint installed on their computer. Likewise, if you are concerned about putting your PowerPoint presentation on the web and giving others access to your intellectual property, then this is the perfect solution for you. Now users can view your PowerPoint presentations, but don’t have access to change it. I have found Impatica 4 to be an easy to use tool that has lots of uses for the work and teaching that I do. If you are using PowerPoint as part of your teaching or professional development then you will want to use Impatica 4 for PowerPoint and give your viewers access to your presentations regardless if they PowerPoint installed on their computer or not. Impatica makes PowerPoint accessible from any browser and compresses it so that they are previewed quickly through any Java enable browser. For more information about Impatica for PowerPoint go to www.impatica.com/offers/inclusiontimes/


If you are interested in supporting the work that I do on the blog, please click on the link above to get special discount pricing. To take a look at a sample PowerPoint presentation that I put on the web click on this link.

Google Launches its Presentation Application


Google today officially launched its presentation tool that rounds out Google Docs and Spreadsheet. Now it is possible to create a slide presentation and view it on the web or have others collaborate on it. Google Present allows you to upload your PowerPoint presentations that can then be modified or viewed on the web. Pretty cool! What a great tool for classrooms and business folks who need to collaborate or publish the presentation to the web. I hope to be able to look at it more carefully from what I see it looks like Google has hit a home run with their online suite of applications.